How do I shoot multi-row 360s?
Step-by-step guide
Here are the recommended steps for shooting multi-row 360s:
First, decide the line of rotation for your multi-row. Imagine an imaginary rotation axis, which is the dotted line in the pictures below. The imaginary rotation line could be the diameter of the turntable (as shown in the first picture) or it can be any other line below or above the table (as shown in the second picture).

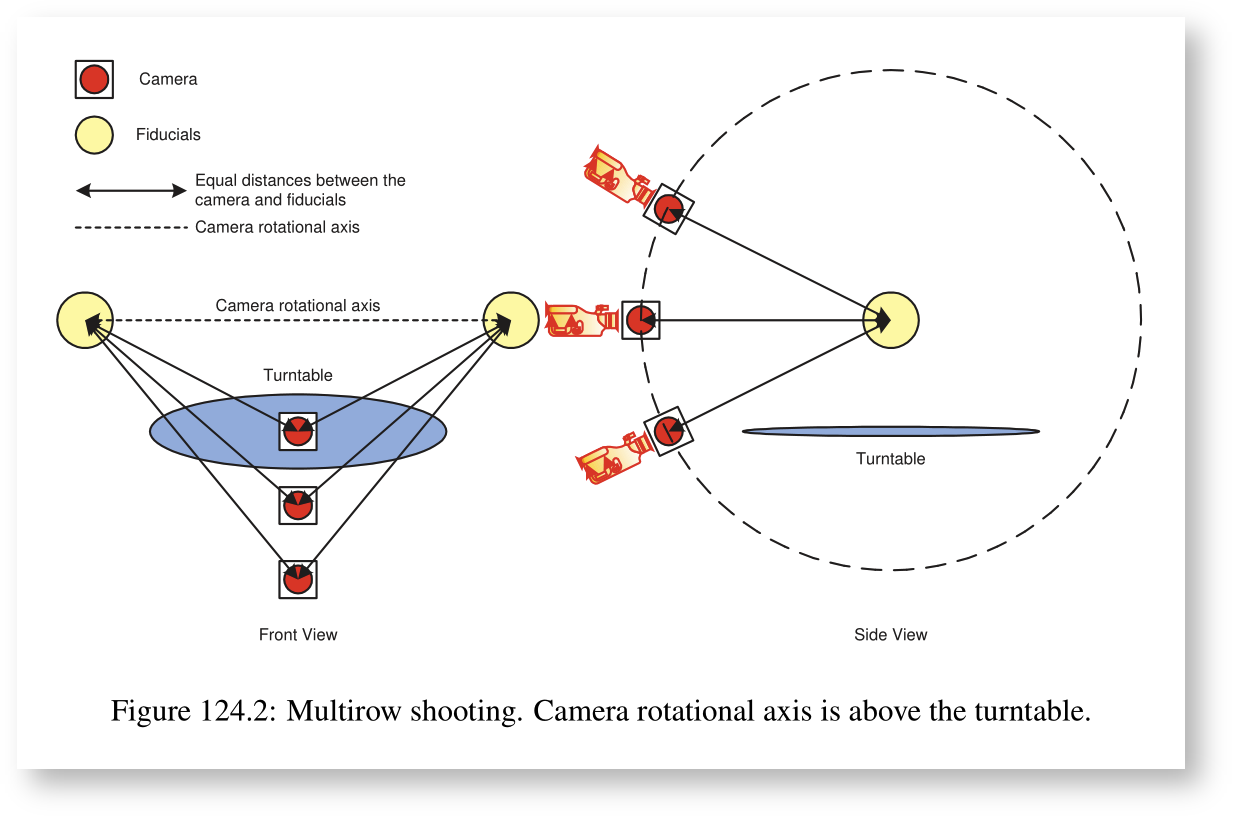
Once the line is decided, place two spherical fiducials (yellow circles) diametrically opposite, on each end of the table.
As you move the camera up, make sure you adjust its position, such that the distance from the camera to the fiducials remains constant, as shown in the pictures above.
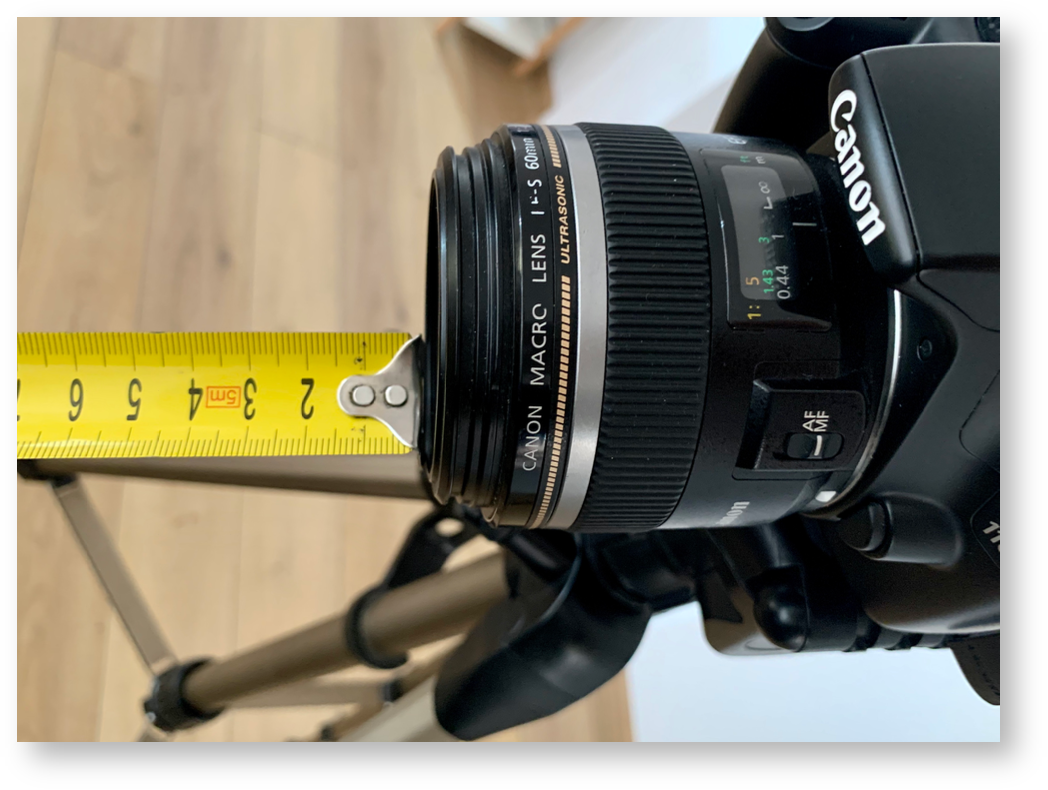
As an approximation, one can use a ruler to maintain an equal distance from the camera to the rotation axis
Please note that as you move the camera up, you will have to tilt the camera down, so that the fiducials in the image remain in the same position on the image. This can be done using the Overlay function in Visere Captura.
- The equidistant and automatic camera tilting can be done using an arm around the turntable, as shown in this picture
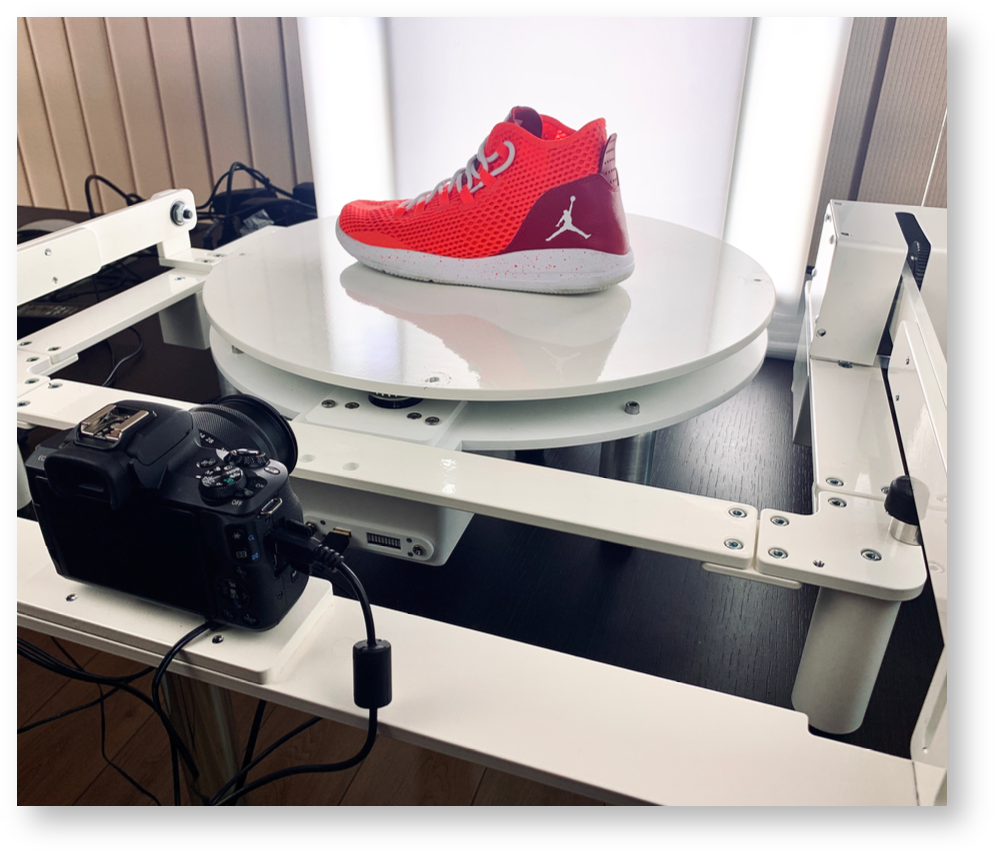
- See the multi-row Jordan sneaker shot using the prototype multi-row arm shown above.