Problem
When editing images and throughout Visere Captura, I'm getting confused about the difference of behavior of the buttons: OK, Apply, Reset, and Restore.
Abstract
Actions apply to the selected thumbnail image. Here is a brief description of each button:
• OK: Applies a filter to the image, closes the dialog box (if present), and resets the filter parameters to their default settings.
• Apply: Applies a filter to the image, keeps the dialog box open (if present), and does not reset the filter parameters.
• Reset: Resets the filter parameters to their default settings and adjusts the image display to best fit. It does not close the dialog box (if present).
• Restore: Reloads the original image as captured by the camera, undoing all edits.
Filter results are automatically previewed, in most cases, but the filters are not applied to the image until OK or Apply is pressed.
Detailed Explanation
To make Visere Captura an efficient image editor, most imaging filters are automatically previewed as the filter parameters are adjusted. For filters that do not automatically preview, such as AIBR, a Preview button is provided to view the filter preview results: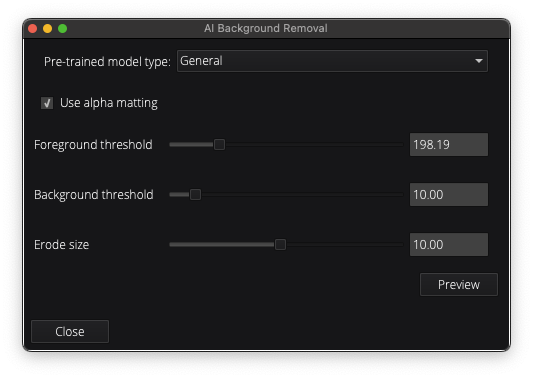
The preview applies to the selected image only. Once the user presses OK or Apply, then the filter is applied to all the selected images.
From the main Visere Captura screen, select the images to edit and click the Edit tools button. The following screen will appear:
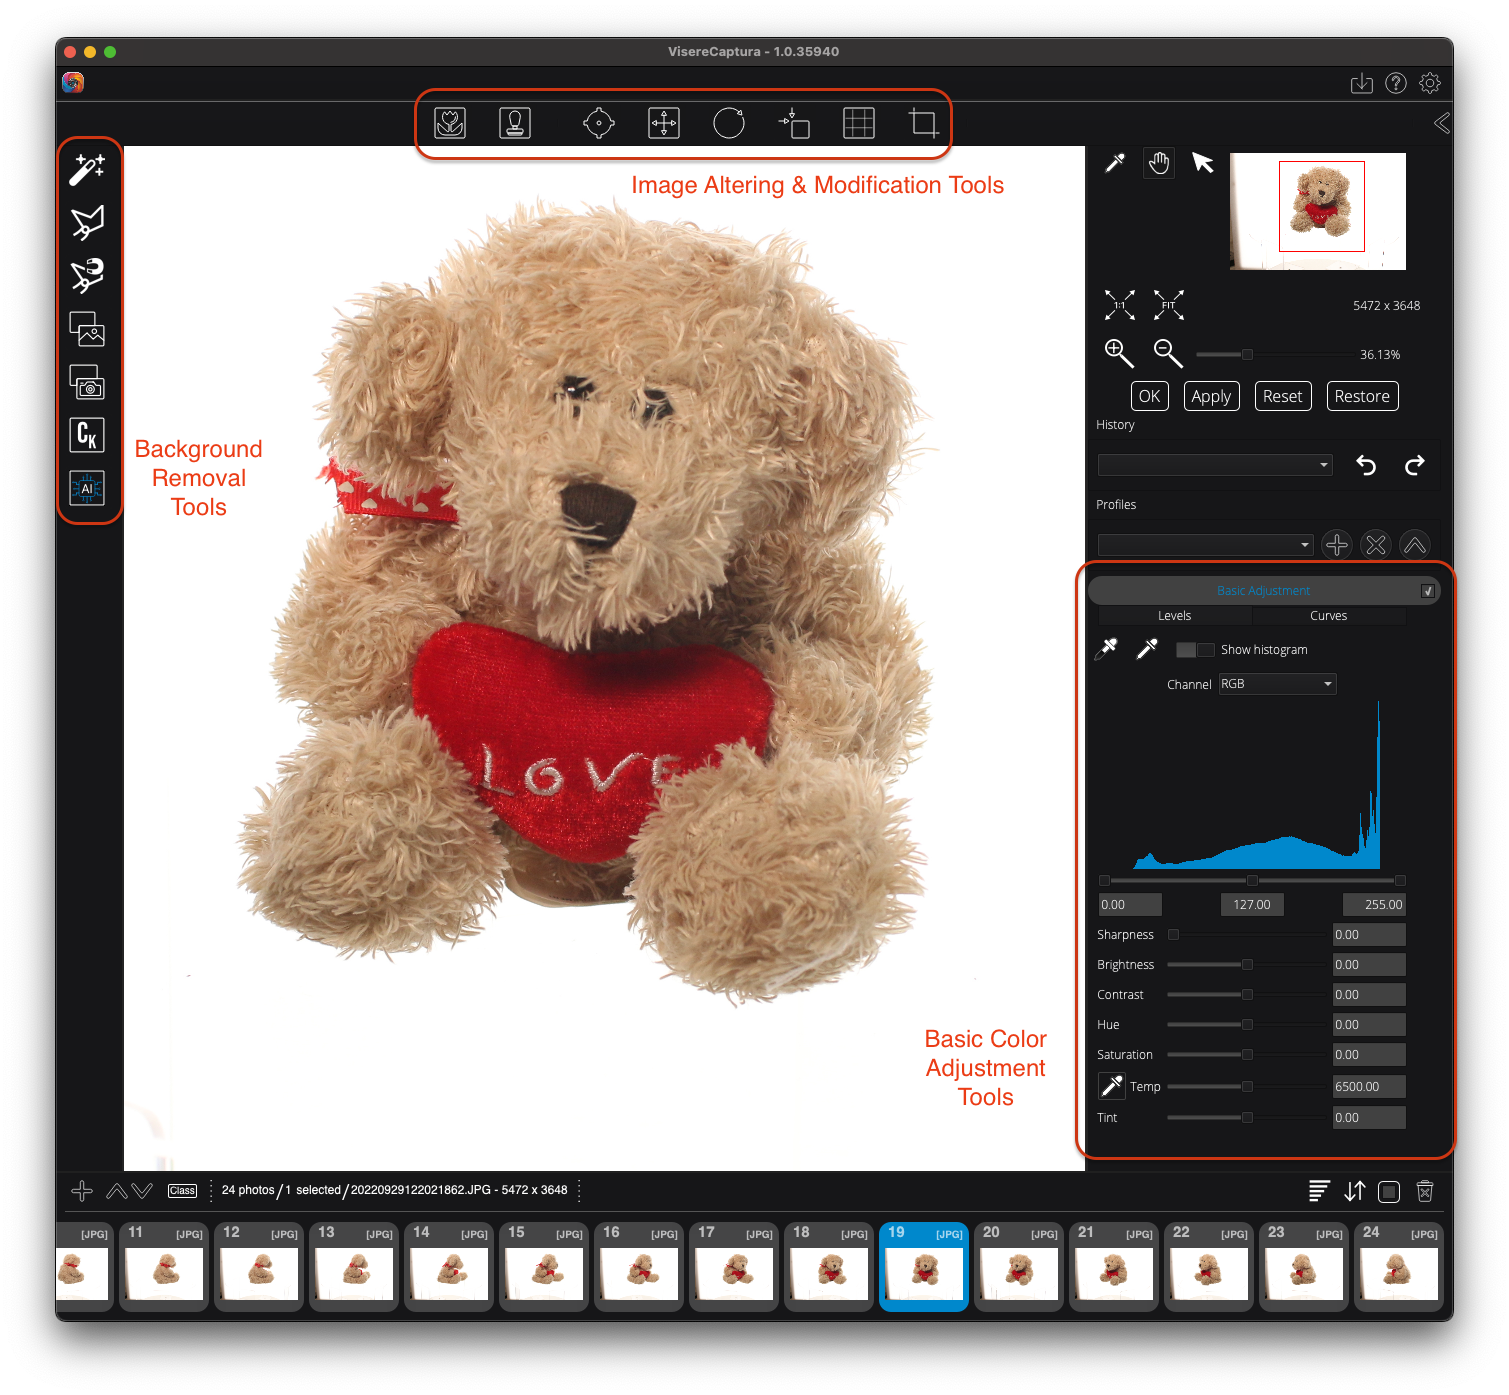
The editing tools are divided into three groups.
Background Removal Tools (Left Top)
These tools are the available background removal (BR) tools, listed from top to bottom:
1. Magic Wand tool.
2. Lasso tool.
3. Magnetic Lasso tool.
4. Reference Image BR tool: Uses a reference image of the background to remove backgrounds.
5. Dual Shot BR tool: Uses two separately exposed images to distinguish between background and foreground.
6. Chroma Key BR tool: Removes the background assuming it is green, red, or blue.
7. AI BR tool: Uses artificial intelligence to remove backgrounds.
Image Altering and Modification Tools (Top Center)
These tools are used for modifying the image, adjusting it, or creating new images. They include, from left to right:
- Focus Stacking. Used to take images taken at different focus lengths to create one sharp image.
- Watermark. This is used to generate a watermarking filter, which can be added at the output time, or at editing time.
- View Alignment. This tools is used to see the locus of multiple, same size, images to better understand how well a 360 is centered.
- Add Canvas. Add left, right, top, and bottom canvas.
- Rotate. Rotate the image.
- Resize. Resize the image.
- Transform. Allows you to shift the image from left to right, top to bottom, for alignment purposes, when trying to center a 360.
- Crop. Crops an image.
Basic Color Adjustment Tools (Right Bottom)
These tools contain the basic color adjust options and they are previewed sequentially:
- Select Levels or Curves. These are two standard methods for manipulating the histogram.
- Sharpness. Applies an unsharp masking.
- Brightness. Applies a histogram adjustment.
- Contrast. Histogram adjustment.
- Hue and Saturation.
- Temperature adjustment based on pixel selection.
- Tint adjustment.
OK, Apply, Reset, and Restore
With the understanding of all the editing tools available, here is how OK, Apply, Reset, and Restore work:
- Only one filter can be active at a time. If you click on a new filter, the previous filter will close down.
- A filter is previewed automatically as the filter parameters are adjusted (in most cases). If a filter does not preview automatically, then the filter will have a Preview button, as in the case of AIBR.
- Preview does not mean that the filter is applied to the image. The filter is applied to the selected images only when OK or Apply is clicked.
- When OK is clicked, the filter is applied to all the selected images and the dialog closes (if the filter has a dialog) and the filter settings are reset to their default values.
- When Apply is clicked, the filter is applied to all the selected imaged and the dialog remains open (if the filter has a dialog) and the filter settings remain, they do not reset to their default values.
- Pressing Reset will restore the filter parameters and the display to their default values. It does not close the dialog box (if the filter has a dialog box).
- Pressing Restore restores all the selected images to the original images that were captured by the camera, undoing all edits.
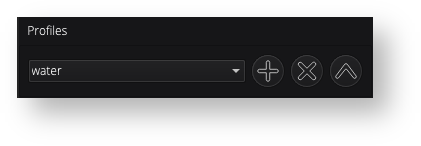
In addition to the OK, Apply, Reset, and Restore, each filter has a Profile (listed to the right of the screen). Clicking the plus next to the profile saves the particular filter settings to a file, which can be recalled later. This is how a Watermark filter can be saved, to be recalled later during the batch or dynamic saving.