360 Interactive Spin
| HTML |
|---|
<iframe src="https://ftp.pictomic.com/360Creator/TeddyBearWithHotsposts/BearWithHotspots/iframe.html" scrolling="yes" class="myIframe"></iframe>

<script type="text/javascript" language="javascript">
$('.myIframe').css('width', ($(window).width()<600) ? $(window).width():600 +'px');
$('.myIframe').css('height', '400px');
</script> |
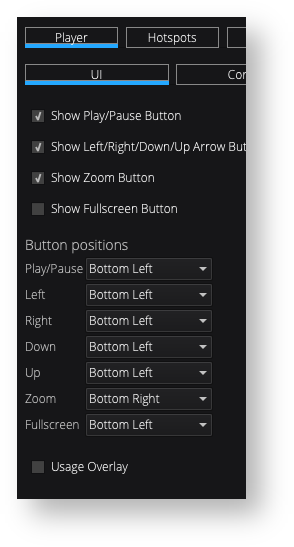
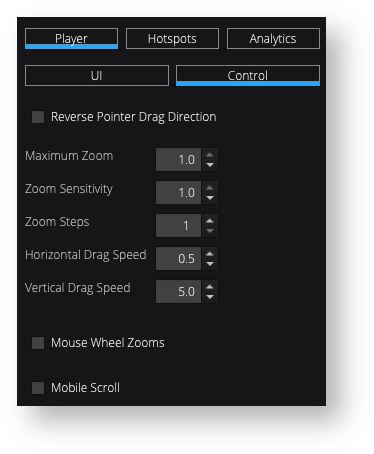
360 Shooting Tools and Specs
| Number of rows | 1 row |
|---|---|
| Frames per row | 24 frames |
| Capture time | 45 seconds |
| Edit time | 10 minutes |
| Turntable | |
| Software | Visere Captura with the 360 Photography Module |
| Accessories | Tripod |
| Camera and lens | Canon R100 with EF 35mm 1:1.4 L |
| Lighting | Medium LumiPad 360 Product Photography Lighting System |
| 360 HTML Zip | Download the zipped 360 file |
| Index.html |
360 Shooting Process
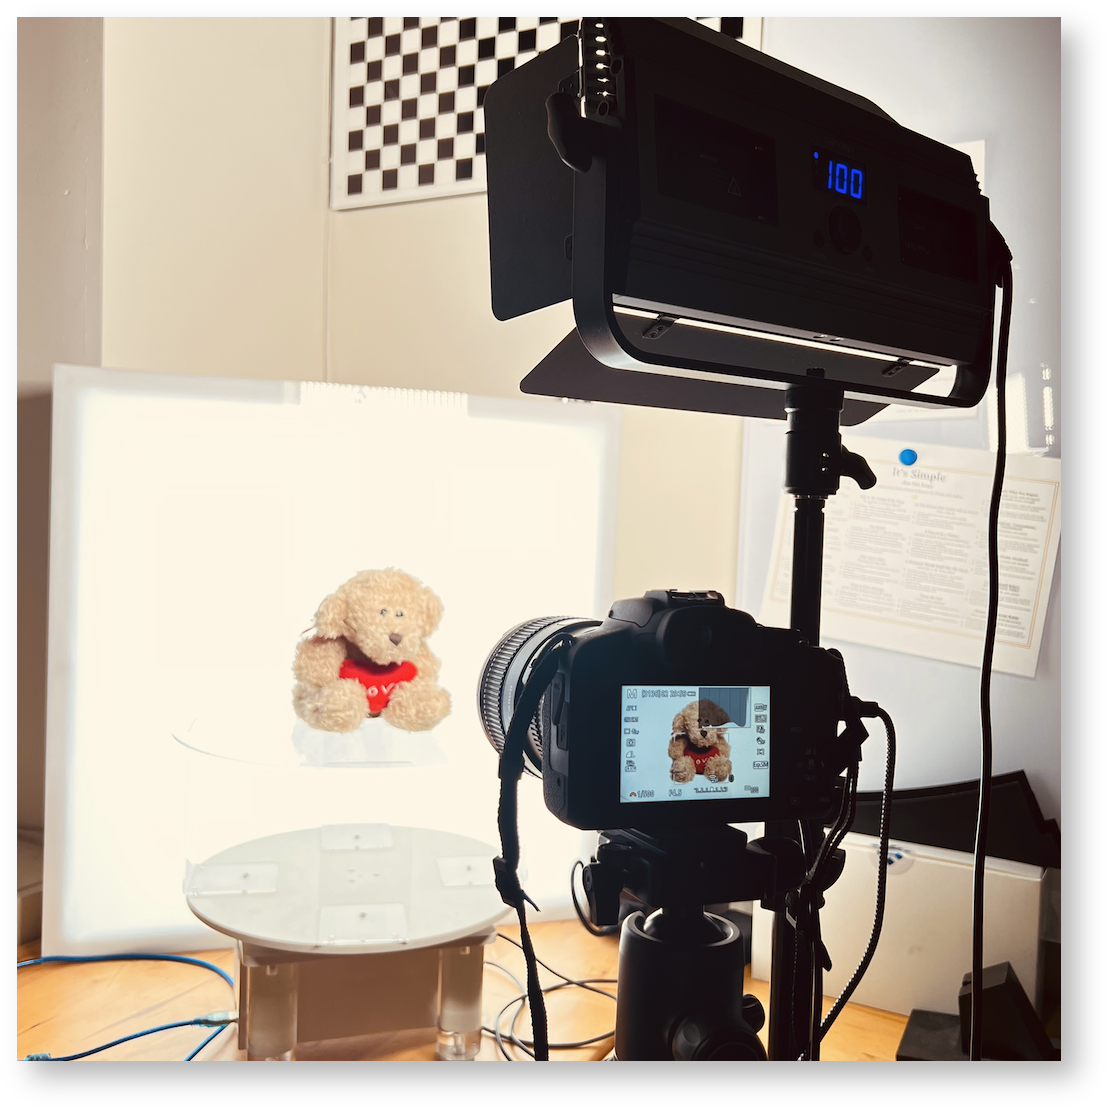
Creating a professional multi-row 360 project doesn’t require advanced photography skills. Create your own professional 360 multi-row projects and understand the process of working with multiple rows. In the following example, we used a hand-built Harley Davidson motorcycle with three different rows.
| Shooting | We used Visere Captura with a pre-crop rectangle ratio of 600x400 600x433 to output 72 24 images per row. We shot three different rows. | ||
|---|---|---|---|
| Multi-Row | See Shoot Multi-Row 360s. | ||
| 360 Creator |
| 360 Creator | Hostspots of different media type were added using the 360 Creator plugin from Visere Captura. The hotspots were added on a frame-by-frame basis, manually placing each hotspot in each frame. This was the most time-consuming part of the entire process. |


360 Shooting Setup
Related articles
| Content by Label | ||||||
|---|---|---|---|---|---|---|
|
| Page properties | ||||
|---|---|---|---|---|
| ||||
|