360 Interactive Spin
| HTML |
|---|
<iframe src="https://ftp.pictomic.com/360Creator/MultiRowHarleyDavidsonB/360-harley-davidson-multirow/iframe.html" noborder widthscrolling="yes" class="600" height="400" scrolling="no" seamless></iframe>myIframe"></iframe> <script type="text/javascript" language="javascript"> $('.myIframe').css('width', ($(window).width()<600) ? $(window).width():600 +'px'); $('.myIframe').css('height', '400px'); </script> |
360 Shooting Tools and Specs
360 Product View Shooting Specs
Total Process Time to Create Web-ready 360 Product View: ~8 minutes
Frame Count: 72 frames/360 rotation (1 capture every 5 degrees)
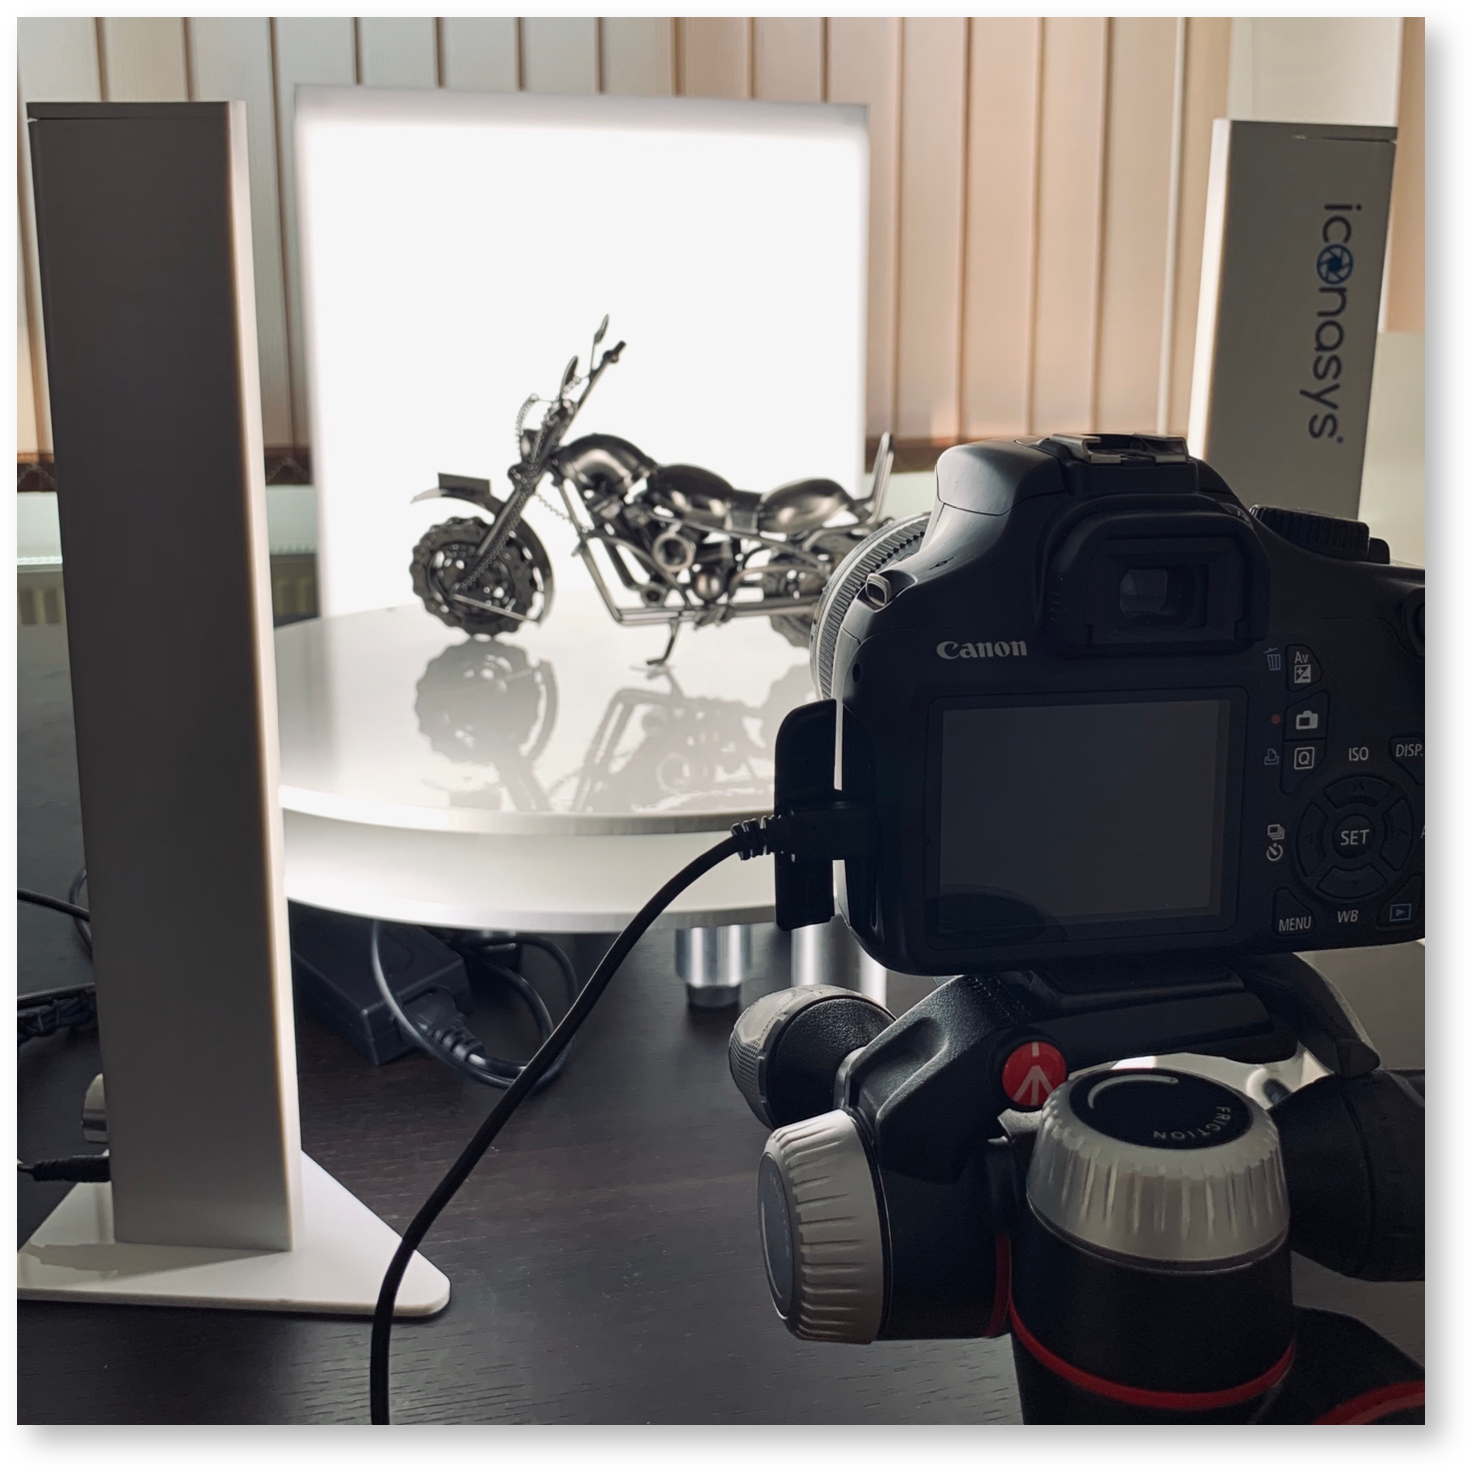
Turntable: Platinum LRG 360 Product Photography Turntable
Software Used: Shutter Stream 360 Product Photography Software
Additional Accessory Used: N/A
Camera/Lens Used:| Number of rows | 3 rows |
|---|---|
| Frames per row | 72 frames (1 every 5 degrees) |
| Capture time | 2 minutes |
| Edit time | 10 minutes |
| Turntable | |
| Software | Visere Captura with the 360 Photography Module |
| Accessories | Tripod |
| Camera and lens |
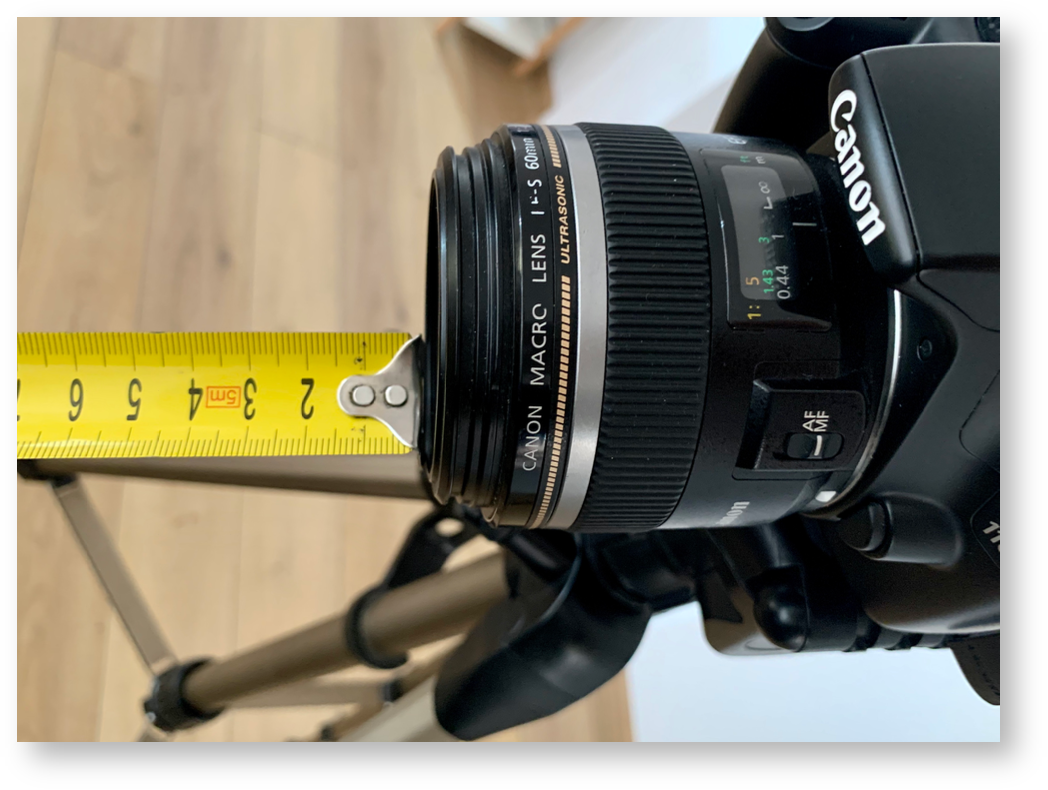
| Canon EOS 1100D with Canon EFS Macro Lens 60mm f/2. |
Zoom Level: Fixed
Flash: No
Lighting Used:File format: PNG
360 Product View Description| 360 HTML Zip | Download the multi-row Harley Davidson zipped 360 |
|---|---|
| Index.html | 360 Multi-Row Harley Davidson |
360 Shooting Process
Creating a professional multirow multi-row 360 project doesn't doesn’t require professional advanced photography skills. After following this article, you will be able to create Create your own professional 360 multirow multi-row projects and learn understand the entire process on how of working with multiple rows work. In the following example, we used a hand-built Harley Davidson motorcycle with 3 three different rows.We can also use
| Shooting | We used Visere Captura with a pre-crop |
|---|
In this example we used a Macro Lens 60mm with F 2.8, distance 105 cm / 41 inch. We've made sure that our object is aligned in the center of the turntable in order to avoid the object going outside the boundaries(in this Harley Davidson example, aligning is crucial in order to keep your object spinning symmetrical in all 360 frames).
After we finally created our project, it's time to share the generated iframe and index links and embed them on our website. In this example the generated iframe link was shared from https://stream.iconasys.com and embedded into a HTML plugin on this page.| rectangle ratio of 600x400 to output 72 images per row. We shot three different rows. | |
| Multi-Row | As the camera is moved upward, we used a ruler to maintain an approximately equal distance between the lens and the object. It’s essential to keep the camera equidistant from the rotational axis of the sphere defined by the camera’s movement.
|
|---|---|
| 360 Creator | Hostspots of different media type were added using the 360 Creator plugin from Visere Captura. The hotspots were added on a frame-by-frame basis, manually placing each hotspot in each frame. This was the most time-consuming part of the entire process. |
360 Shooting Setup
Related articles
| Content by Label | ||||||||||||||||
|---|---|---|---|---|---|---|---|---|---|---|---|---|---|---|---|---|
|
| Page properties | ||
|---|---|---|
| ||
|